

[[{“value”:”
Hey AI Breakers 👋
Are you burning thousands a month on a video editor who still takes 3 days to turn around a simple 15-second ad?
Today, you’ll build an AI Video Studio that creates branded marketing videos from prompts alone, powered by Claude Code. No editing software. No camera. No retainer.
-
✅ A brand foundation every future video automatically inherits
-
✅ A 5-second logo intro ready to paste onto any post
-
✅ A 15-second product teaser with animated text and a closing CTA
-
✅ A 10-second data reveal clip for metrics, milestones, or social proof
-
✅ A batch factory that renders 10 Meta ad variations from one template
-
✅ A one-click export pipeline that turns everything into upload-ready MP4s
Let’s build it 👇

🧠 How This Works
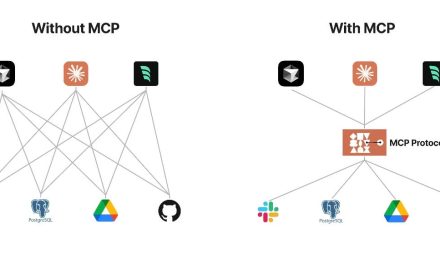
Three moving parts working together inside Claude Code:
-
🖥️ Claude Code in VS Code — your AI assistant, running inside a free code editor
-
🎨 A BRAND.md file — one markdown file that teaches Claude everything about your brand so every video comes out on-brand automatically
-
⚙️ A free video framework that turns Claude’s output into real MP4 files on your laptop
Here’s the loop you’ll run every time you want a new video:
-
✏️ Prompt Claude in plain English
-
📋 Review the storyboard Claude proposes before any code is written
-
👀 Preview it live in your browser
-
🔁 Refine with follow-up prompts until it lands
-
🎬 Render to MP4 with one command
We’ll get there in three moves: set up Claude Code inside VS Code, teach Claude your brand, then turn on the video magic.
🛠️ Set Up Claude Code in VS Code (2-Minute Setup)
We’re running Claude Code inside VS Code because it’s the most beginner-friendly path. Zero terminal commands to memorize. Here’s what to do:
-
Install VS Code (free). Download at code.visualstudio.com and open it.
-
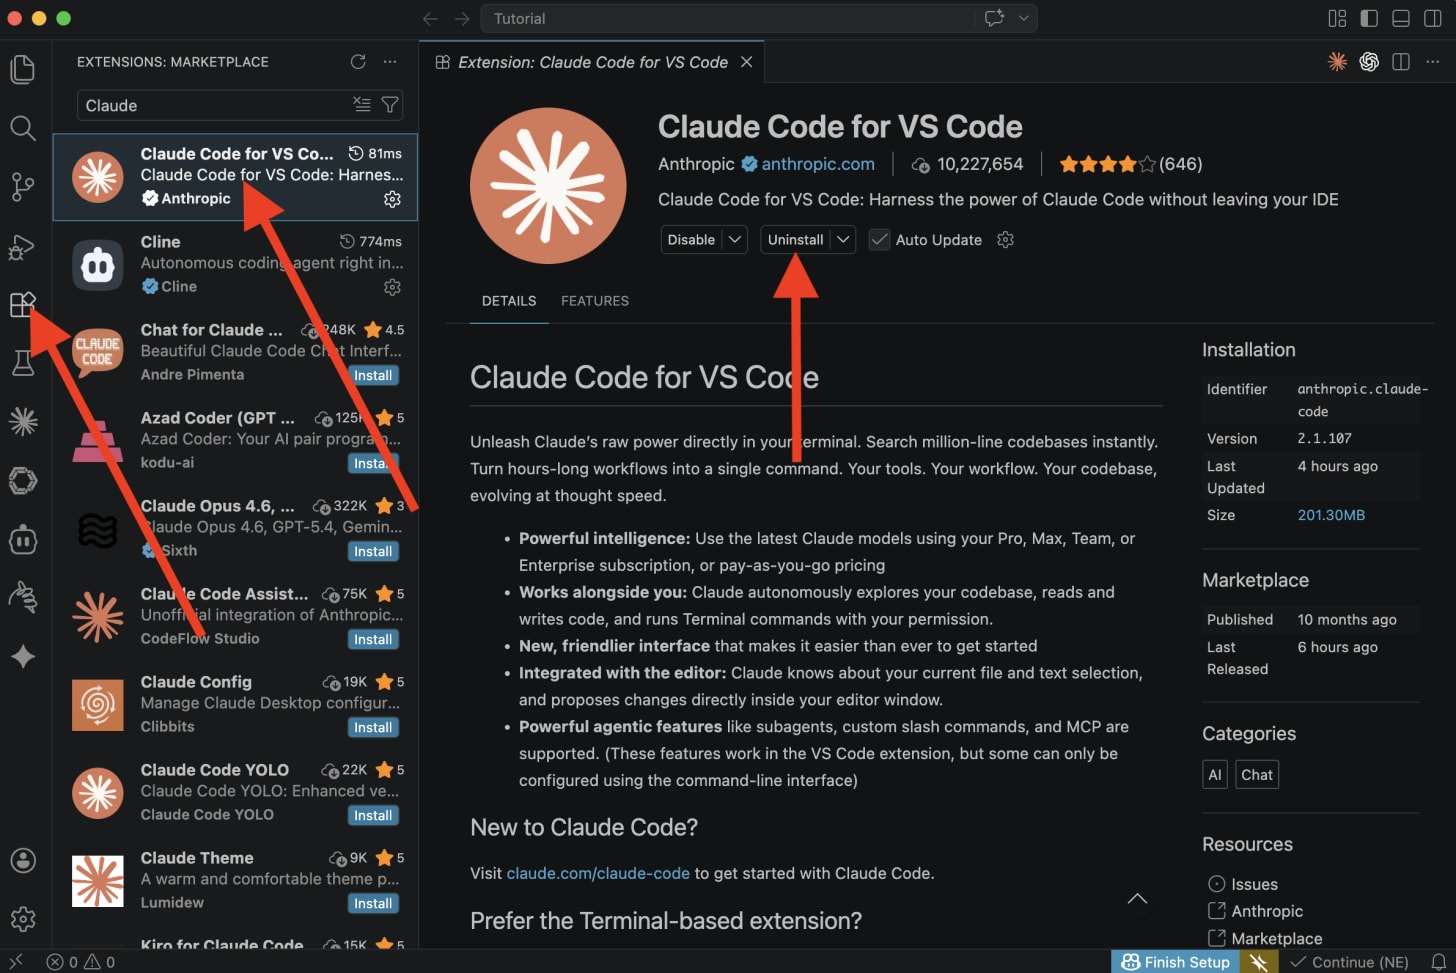
Install the Claude Code extension. Click the Extensions icon in the left sidebar, search “Claude Code”, click Install.
-
Sign in. Click the Claude Code icon in the sidebar and log in with your Claude account.
-
Create an empty folder anywhere on your computer (e.g.
~/my-video-studio) and open it in VS Code via File → Open Folder. -
Open Claude Code from the sidebar. You’re now ready to prompt.

Prefer a different setup? You can also run Claude Code from the Claude Desktop app or directly in your terminal. Every prompt below works identically across all three. VS Code is just the easiest place to start.
🎨 Prompt #1 → The Brand File (Your Single Source of Truth)
Before we build anything, we teach Claude everything about your brand: colors, fonts, voice, audience. We drop it all into one markdown file Claude reads before generating any video.
This file alone is worth the setup. You can reuse BRAND.md in every future Claude Code project that touches content, ads, or copy.
The goal:
-
A
BRAND.mdfile in your workspace folder -
A single source of truth Claude references on every future prompt
-
Easy to edit later when your brand evolves
✅ Use this to make every piece of output Claude produces for you automatically on-brand, forever.
You have three easy ways to feed your brand info into Claude. Pick whichever is easiest:
-
🖊️ Type it manually — the prompt below has a template you fill in
-
🌐 Share your website URL and Claude reads the site to pull your tone, positioning, and visual style
-
📄 Drop a brand guidelines PDF into your workspace folder and Claude reads it directly
You can combine them. Paste the URL and drop the PDF and fill in whatever fields you already know. Claude merges everything into one clean BRAND.md.
Prompt:
You are a senior brand strategist and motion designer. Create a file named BRAND.md in the current folder. This file will be the single source of truth for every video we build together.

Here is what I can give you about my brand (fill in anything you know, leave blank anything you don't):

BRAND NAME: [YOUR BRAND NAME]
TAGLINE: [YOUR TAGLINE or leave blank]
WHAT WE DO: [ONE-LINE DESCRIPTION or leave blank]
AUDIENCE: [WHO THE VIDEOS ARE FOR or leave blank]

COLORS (optional, leave blank if you want Claude to decide):
- Primary: [HEX, e.g. #6366f1]
- Secondary: [HEX]
- Background: [HEX]
- Text: [HEX]

FONT: [e.g. Inter, or leave blank]
VOICE: [3 adjectives, e.g. bold, playful, confident, or leave blank]

ADDITIONAL SOURCES (use whatever I gave you):
- WEBSITE: [YOUR WEBSITE URL, or leave blank]
- BRAND GUIDELINES PDF: [filename.pdf if I dropped one in the project, or leave blank]

Your tasks:

1. If I gave you a website URL, fetch it and read the copy. Extract: tone of voice, positioning, key messages, and any visible color palette.

2. If I gave you a brand guidelines PDF, open and read it. Extract: colors (as HEX), fonts, voice rules, and do/don't guidance.

3. Merge everything I typed manually with what you learned from the website and PDF. When sources disagree, prefer what I typed manually.

4. Create BRAND.md in the current folder using clean markdown with these sections:
   - Overview (brand name, tagline, what we do, audience)
   - Colors (HEX values)
   - Typography (font choice)
   - Voice (3-5 adjectives plus 5 sample headlines written in my voice)
   - Video Guidelines (default aspect ratios 1080x1920 vertical, 1080x1080 square, 1920x1080 landscape; 30fps; fast, snappy pacing)
   - Instructions for AI

5. In the "Instructions for AI" section, include these rules future Claude sessions must follow:
   - Always read BRAND.md before writing any video code
   - Apply the colors, fonts, voice, and guidelines consistently across every composition
   - Before generating code for any video, propose a short 3-scene storyboard first (plain English, no code) and wait for my approval
   - When I paste a screenshot of the preview with notes, treat it as visual feedback and translate it directly into code changes

When done, show me the final file and confirm it is saved in the current folder. If you made any judgment calls (like picking colors I didn't specify), list them so I can override.
🧠 Tip: BRAND.md is the most important file in this entire tutorial. Spend an extra 5 minutes dialing in the voice and colors. Every video after this inherits from it, so good input here compounds across every single video you ever make.
🎬 This Is Where The Magic Happens
You’ve got Claude Code running and a BRAND.md that teaches it everything about your brand. Now we turn Claude into a full-blown video studio.
Here’s the secret: Claude Code pairs with a free, open-source framework called Remotion.
Remotion is React for video. Instead of dragging clips on a timeline, Claude writes code that describes each frame, and Remotion renders it into a real MP4 file you can post anywhere.
The best part: Remotion ships with an official Claude Code skill pack that teaches Claude every animation pattern, API, and best practice before your first prompt. You never write a line of React. You just describe what you want.
Over the next 6 prompts, you’ll build:
-
🏗️ A scaffolded Remotion project (Claude installs everything for you)
-
✨ A 5-second logo intro you can bolt onto any post
-
📹 A 15-second product teaser with hook, value, and CTA beats
-
📊 A 10-second data reveal clip for metrics and milestones
-
🏭 A 10-variation ad factory (this is where your editor can’t compete)
-
🎬 A one-command render pipeline that spits out every video as an MP4
Let’s go 🚀
🏗️ Prompt #2 → The Setup Wizard (Let Claude Install Everything)
Instead of memorizing installation commands, we’re going to let Claude Code set up the whole project for us. This is the only “technical” prompt in the tutorial, and Claude does all the lifting.
The goal:
-
A working Remotion project inside your folder
-
Live preview running in your browser
-
Your existing BRAND.md preserved and accessible from the project root
✅ Use this once per project. Claude handles Node, npm, and Remotion in one go.
Prompt:
“}]] Read More in The AI Break


