Good Morning,
I hope this guide finds you well. To check out our growing archive of guides go here. Don’t forget at the end of this article to check out our Claude Code reading list. 2026 is the year courses and education in AI becomes its own sub genre in the Substack Technological Category and community. So don’t be surprised if you see AI Newsletters popping with their guides up on the Education category. There’s momentum here that’s hard to describe.
While it’s not clear if Generative AI will democratize opportunity, if you are a self-starter staying ahead of the curve, it will certainly help your professional prospects.
writes a Newsletter very focused around Claude Code. Check it out:
Claude Code Newsletter

Michael is a self-taught programmer who specializes in AI-assisted development frameworks.
I asked him about synergy between NotebookLM and Claude Code specifically. By the way, product manager has also doubled down on Claude Code of late, along with Jeff Morhous.
Don’t ask me if Anthropic reaches amplifications around recursive self-improvement (RSI) in product first, but what’s clear is that in 2026 Claude Code has evolved from a sophisticated autocomplete tool into the industry-standard no-code and natural language agentic coding assistant.
If you want to learn about AI that can help you build and automate things, it should be one of your top priorities for hands-on experimentation and skill development.
Go Deeper
-
The ultimate guide to Claude Code orchestration
-
Claude Code Subagents: The Orchestrator’s Dilemma
-
A Retrodictive Transformer That Corrects Its Own Predictions with Cross Attention
-
The Science of AI Internal State Awareness: Two Papers That Validate Response-Awareness Methodology
Learn more about NotebookLM.

Let’s begin.
How to Use NotebookLM with Claude Code: From Beginner to Advanced
You might not realize what sets NotebookLM apart from other AI tools.
What Are These Tools?
NotebookLM is Google’s free AI assistant that only answers questions based on documents you upload. Unlike ChatGPT or Claude that draw from their training data, NotebookLM works exclusively with your sources. Upload a PDF. Ask questions. Get answers with citations pointing to exact passages.
Claude Code is Anthropic’s AI coding assistant. You describe what you want to build. Claude writes the code, creates files, runs tests, and iterates on your project. It handles the implementation while you guide the architecture.
Together, they create a powerful workflow: NotebookLM helps you learn and understand. Claude Code helps you build and implement.
Why NotebookLM is different
NotebookLM only answers questions based on documents you upload. That’s it. No training data hallucinations. No generic internet knowledge bleeding into your specific domain. Just your sources, analyzed with precision.
What NotebookLM Actually Is
NotebookLM is a RAG system:
RAG stands for Retrieval Augmented Generation. Standard AI models answer from training data. RAG systems answer from specific documents you provide. They retrieve relevant passages from your sources, then generate responses grounded in that content.
The technical implementation gets complex. Vector databases. Embedding models. Chunking strategies. Building a production RAG system takes serious engineering.
NotebookLM handles all of it. Upload PDFs, Google Docs, websites, YouTube videos. It indexes them. Ask questions. Get answers with direct citations pointing to specific passages in your sources.
The difference: when it tells you something, you can verify it instantly. Click the citation. See the exact source text. No mystery about where information came from.
Why this matters: you’re building a knowledge base that compounds. Every document you add makes the system smarter about your specific domain. Not the internet’s domain. Yours.
What It Was Designed For
NotebookLM started as a tool for researchers and students. Upload research papers. Generate study guides. Create comprehensive summaries. Build understanding from primary sources.
The core workflows:
Research synthesis: Upload 20 papers on a topic. Ask questions that span all sources. NotebookLM surfaces connections between papers. Shows where research agrees or contradicts. Points you to specific passages for deep reading.
Study preparation: Upload course materials. Generate flashcards from key concepts. Create quizzes testing your comprehension. Request study guides organized by difficulty. The system adapts to what you need to learn.
Literature review: Building the related work section for a paper? Upload relevant papers. Ask NotebookLM to identify common themes. Find gaps in existing research. Generate timeline of developments. All with citations to specific passages.
Writing from sources: Working on a report? Upload all source material. Ask questions as you write. Verify claims. Find supporting evidence. Check if your interpretation matches the source text. The citations keep you honest.
The audio overview feature works particularly well here. Upload dense academic papers. Generate conversational podcast explaining the content. Listen while commuting. The AI hosts break down complex concepts. They debate interpretations. They connect ideas across papers.
This is multimodal learning matched to your actual life. Different formats for different situations.
Have dedicated study time? Generate flashcards for active recall. Take quizzes testing comprehension. Read detailed reports with proper structure. Deep focus work with traditional study materials.
Strapped for time? Listen to podcasts on the commute. Absorb video overviews while cooking. Audio and visual learning that fits into the margins of your day.
Complex visual information? Watch video overviews with diagrams. See architecture unfold visually. Process flow explained with graphics pulled from your sources.
Dense conceptual material? Mind maps show relationships. Audio conversations make abstractions concrete. Multiple entry points into the same knowledge.
The same sources. Reformatted for how you actually learn. Not fighting your schedule or learning style. Working with both.
Result: knowledge absorption accelerates. You’re not fighting with PDF readers. Not jumping between papers. Not losing context. The system maintains synthesis while you focus on understanding.
Getting Started: Your First Notebook
Let’s build your first NotebookLM notebook step by step.
Step 1: Access NotebookLM
Go to notebooklm.google.com. Sign in with your Google account. Click “New Notebook” in the top left.
Step 2: Add Your First Source
Click the “+” button or drag a file into the window. You can upload:
-
PDFs (research papers, ebooks, reports)
-
Google Docs from your Drive
-
Text files
-
Websites (paste any URL)
-
YouTube videos (paste the link)
For your first try, upload a PDF you need to understand. Maybe a technical paper. A course textbook chapter. Work documentation.
Step 3: Wait for Processing
NotebookLM indexes your document. This takes 10-30 seconds depending on length. You’ll see “Processing…” then “Ready to chat.”
Step 4: Ask Your First Question
The chat interface appears on the right. Ask specific questions about your document:
-
“What are the main arguments in this paper?”
-
“Explain the methodology section”
-
“What conclusions does the author reach?”
NotebookLM responds with citations. Each citation is clickable. Click it. See the exact passage that informed the answer.
Step 5: Generate Your First Audio Overview
Click “Studio” at the top. Click “Audio Overview.” Click “Generate.”
NotebookLM creates a podcast-style conversation. Two AI hosts discuss your document. They explain concepts. Debate interpretations. Connect ideas.
This takes 2-3 minutes to generate. Then you can listen or download.
Step 6: Try Other Studio Outputs
In the Studio panel, you’ll see options for:
-
Flashcards: Test your retention of key concepts
-
Quiz: Multiple choice questions from your sources
-
Mind Map: Visual connections between topics
-
Reports: Structured summaries in different formats
Generate each one. See which format helps you learn best.
Step 7: Add More Sources
Click the “+” again. Add related documents. The more sources you add, the more connections NotebookLM can make.
Ask questions that span multiple sources: “How do these two papers differ in their approach?” NotebookLM synthesizes across all your documents.
Common Beginner Mistakes to Avoid:
Don’t upload 50 sources immediately. Start with 2-3 related documents. Learn the interface. Understand how it responds.
Don’t ask vague questions. “Tell me about this paper” gets generic summaries. “What methodology did they use for data collection?” gets specific answers with citations.
Don’t ignore the citations. Always verify. Click through. Make sure the AI interpreted correctly.
Don’t treat audio overviews as primary sources. They’re explanations of your sources. Always check the actual documents for precision.
Have questions? I put together a notebook about Notebooklm. Try asking NotebookLM any questions you have about NotebookLM:
Check out our Example.
Video
Audio
Advanced Learning: Complex Technical Domains
Once you’re comfortable with basics, NotebookLM handles complex technical learning.
I needed to learn the entire ComfyUI image and video generation pipeline. From Flux image generation through WAN 2.2 video to LoRA training. Complex ecosystem. Hundreds of tutorials scattered across Reddit, YouTube, GitHub.
The workflow: pulled 100+ sources into a single notebook. Tutorials. Video transcripts. Reddit threads. Technical documentation. Everything in one place.
Then I started asking synthesis questions:
“How do I use Flux Kontext to generate images for LoRA training?”
NotebookLM synthesized information across multiple sources. Step-by-step answers with citations. When approaches contradicted, it showed both with source links.
The audio deep dive changed the learning curve. Generate podcast-style conversations about the material. Listen while working on other tasks. The AI hosts surface connections. Explain complex concepts conversationally. Reference specific passages.
Result: zero knowledge to complete workflows in weeks. All documented in sources, accessible through conversation.
Content Repurposing Workflow

Technical writing benefits from multiple formats. My Substack publishes long-form AI development articles. Some readers prefer audio.
The workflow: upload article as source. Request long-form audio deep dive. Two AI hosts break down complex concepts. Debate nuances. Explain technical details conversationally.
The insight: audio format reveals writing weaknesses. Hosts struggle to explain something clearly? That section needs revision. They naturally connect separated ideas? Maybe those sections belong together.
Audio becomes editorial feedback.
Using NotebookLM with Claude Code
Here’s where these tools become powerful together. NotebookLM builds understanding. Claude Code executes implementation. The synergy multiplies effectiveness.
Workflow 1: Project Planning
Before writing any code, use NotebookLM to develop comprehensive understanding.
Step 1: Gather Requirements
Upload all project-related documents to a NotebookLM notebook:
-
Product requirements documents
-
User stories or feature specs
-
Technical constraints
-
Similar projects or examples
-
API documentation for integrations
Step 2: Generate Project Brief
Ask NotebookLM: “Create a comprehensive technical brief covering the requirements, constraints, and recommended architecture.”
Review the brief. NotebookLM cites specific requirements. Shows where constraints conflict. Suggests architectural patterns based on your sources.
Step 3: Create Audio Overview
Generate an audio overview of the project. Listen during your morning walk. The AI hosts discuss technical challenges. Debate implementation approaches. Surface edge cases you hadn’t considered.
Step 4: Generate Mind Map
In Studio, create a mind map. See how features connect. Where dependencies exist. What can be built in parallel.
Screenshot the mind map.
Step 5: Brief Claude Code
Open Claude Code with clear, informed instructions:
“Build a [project type] with these requirements: [paste the brief]. Key architectural decisions: [decisions from mind map]. Critical constraints: [from your sources].”
Result: Claude Code starts with complete context. Your instructions are precise. The implementation aligns with actual requirements from the start.
Workflow 2: Debugging When Claude Gets Stuck
Claude Code encounters a bug it can’t solve. The implementation is stuck. This is where NotebookLM provides breakthrough insights.
Step 1: Capture the Context
Save these files from your project:
-
The problematic code file
-
Error logs or stack traces
-
Related module that might cause the issue
-
Any relevant documentation
Step 2: Create Debugging Notebook
New NotebookLM notebook. Upload all the context files.
Step 3: Ask Root Cause Questions
Don’t ask “what’s wrong with this code?” Too broad.
Ask specific questions:
-
“What assumptions does this error handling make?”
-
“How do these two modules interact around authentication?”
-
“What edge cases could cause this timeout?”
NotebookLM analyzes across all sources. Finds patterns. Shows where assumptions conflict.
Step 4: Generate Explanation
Request: “Create a detailed technical explanation of how the authentication flow works based on these files, highlighting potential failure points.”
NotebookLM writes comprehensive analysis with citations to specific code sections.
Step 5: Return to Claude Code with Understanding
You now understand the root cause. Not just “it’s broken” but why it’s broken.
Instruct Claude: “The issue is in the authentication flow. The middleware assumes [assumption], but the route handler expects [different assumption]. Modify the middleware to handle [specific case].”
Claude implements the fix correctly because your instruction addresses the actual problem.
Workflow 3: Code Review and Verification
Claude Code just generated a complex implementation. You need to verify quality before moving forward.
Step 1: Upload Generated Code
Take the files Claude just created. Upload them to NotebookLM.
Step 2: Request Technical Review
Set custom goal: “Act as a senior code reviewer focused on security, performance, and maintainability.”
Ask: “Review this implementation for potential issues, focusing on edge cases, security vulnerabilities, and performance bottlenecks.”
NotebookLM analyzes the code. Points to specific sections with concerns. Cites best practices from any documentation you’ve uploaded.
Step 3: Generate Explanatory Article
Request: “Write a technical explanation of how this caching implementation works, including its design decisions and tradeoffs.”
Read the explanation. Does it make sense? Are the tradeoffs acceptable? Do you understand what Claude built?
Step 4: Quiz Yourself
Generate a quiz about the implementation. Take it. Do you actually understand this code?
If you fail questions, you don’t understand the implementation well enough to maintain it.
Step 5: Iterate with Claude
Return to Claude Code with specific feedback: “The caching strategy has a race condition when [specific scenario]. Modify it to handle concurrent access by [specific approach].”
Your feedback is precise because you understand the implementation.
The Codebase Dashboard Strategy

Claude Code is powerful. But it has limits. Usage caps. Context window constraints.
I wrote about this in my article on orchestrator architecture. When you’re deep in implementation details, your architectural overview gets buried under tokens. Context rot. Your comprehensive plan competes with implementation specifics for the same context window.
NotebookLM solves this through separation of concerns. Claude Code handles implementation. NotebookLM handles knowledge retrieval and learning.
The paid plan allows 300 sources per notebook. That’s 300 files from your codebase. Every module. Every configuration file. Plus your architecture documents. Code format standards. Requirement specifications. Design decisions with rationale.
Your entire system in one searchable notebook.
Here’s my workflow for a module I need to understand:
Generate an audio overview. A podcast conversation breaks down the dialogue system. Two AI hosts discuss implementation choices. Why does the event queue process story beats this way? How the character state manager connects to the visual novel renderer. How choices propagate through the narrative tree. I listen while away from the keyboard. While cooking. While walking.
For complex components, I generate explanatory articles. Detailed writeups on how the scene transition system works. Why does the inventory management follow this particular pattern? What assumptions the save/load system makes about game state. These become reference documentation generated from actual code. Grounded in implementation reality.
This is the bridge between me and Claude Code.
I’m a self-taught programmer who codes with AI. I don’t always understand everything Claude generates. Complex patterns. Architectural decisions. Optimization techniques I haven’t encountered before.
So I pop a file into NotebookLM. Generate a podcast explaining the changes. The AI hosts break down what Claude just built. Why this pattern instead of that one. What tradeoffs exist. How it connects to other modules.
Result: I understand my own codebase. Not just trusting the AI. Actually comprehending the implementation.
This saves Claude Code usage limits. Instead of burning tool credits asking “explain this code,” I use NotebookLM. Different system. Different token budget.
It manages context for better coding performance. I’m not asking Claude to explain and implement simultaneously. Keep implementation context clean. Use NotebookLM for learning.
When I go down learning rabbit holes, I do it in NotebookLM. Explore edge cases. Research alternative approaches. Understand dependencies. Keep Claude Code focused on the core plan.
Most critically: it makes me a better partner for Claude, the AI is only as good as its user. When I return with feedback, I understand what I’m looking at. My questions become precise. My architectural decisions stay consistent. My requirements align with technical reality.
The gap between “I want this feature” and “I understand this system” closes.
For large codebases, subdivide into multiple notebooks. One for frontend. One for backend. One for infrastructure. Each maintains focused context.
Workflow 5: Documentation Generation
Your codebase exists. Documentation doesn’t. Or it’s outdated. NotebookLM can generate accurate documentation from actual implementation.
Step 1: Upload Module Files
Take a complete module. All related files. Upload to NotebookLM.
Step 2: Request Documentation
Ask: “Generate comprehensive documentation for this module covering: purpose, architecture, key functions, usage examples, and edge cases.”
NotebookLM analyzes the actual code. Generates documentation grounded in implementation reality. Not aspirational docs. Not outdated specs. What the code actually does.
Step 3: Generate Different Formats
Create multiple documentation outputs:
-
Report format: Technical reference for developers
-
Video overview: Visual walkthrough with code diagrams
-
Audio overview: Onboarding material for new team members
-
Flashcards: Quick reference for common functions
One codebase. Multiple documentation formats. Each serves different needs.
Step 4: Use Claude Code for Integration
Copy the generated documentation. Feed it to Claude Code: “Add this documentation as inline comments and README files following our documentation standards.”
Claude handles formatting. Consistent style. Proper structure. The content comes from NotebookLM’s analysis.
Step 5: Keep Documentation Updated
When code changes, update the NotebookLM notebook. Regenerate documentation. Feed updates to Claude Code.
Documentation stays synchronized with implementation.
What Changed Since January 2025
NotebookLM shipped major updates. Here’s what matters:

Chat improvements: Larger context window. Longer conversation memory. Quality improvement. You can now set custom goals for conversations. Tell it to act like a technical reviewer. Or a teaching assistant. Or a code documentation expert.
Context window expansion means: entire codebases in one notebook. Full tutorial collections. Complete research paper repositories.
Video Overviews: Beyond audio podcasts. NotebookLM now generates narrated slides. Visual explanations with diagrams, quotes, numbers pulled from your sources. Different formats: Brief, Explainer, Critique, Debate.
The visual format works better for process documentation. Code architecture. Data flow diagrams. Anything where seeing structure matters.
Interactive Audio Overviews: You can join the conversation now. The AI hosts are discussing your documents. Jump in. Ask questions. They incorporate your inquiry into the dialogue. Keep the conversational flow.
Flashcards and quizzes: Customizable difficulty. Selective sources. Language options. I don’t use these for initial learning. But for reinforcement? For checking retention? Effective.
Mind Maps: Visual topic exploration. See how concepts connect. Navigate your knowledge base spatially instead of linearly.
The critical insight: these features compound. Generate audio overview. Review mind map. Take quiz. Each reinforces learning through different cognitive pathways.
Discover sources: NotebookLM can now find related sources from the web. Upload your core documents. Ask it to find supplementary material. It searches. Suggests relevant sources. You add what’s useful.
This closes a gap: NotebookLM was great for analyzing sources but couldn’t find new ones. Now it does both.
Multiple outputs per notebook: Create multiple audio overviews in different languages. Generate video explanations for different audiences. Build flashcard sets for different difficulty levels.
One notebook. Multiple learning formats. Each tailored to specific needs.
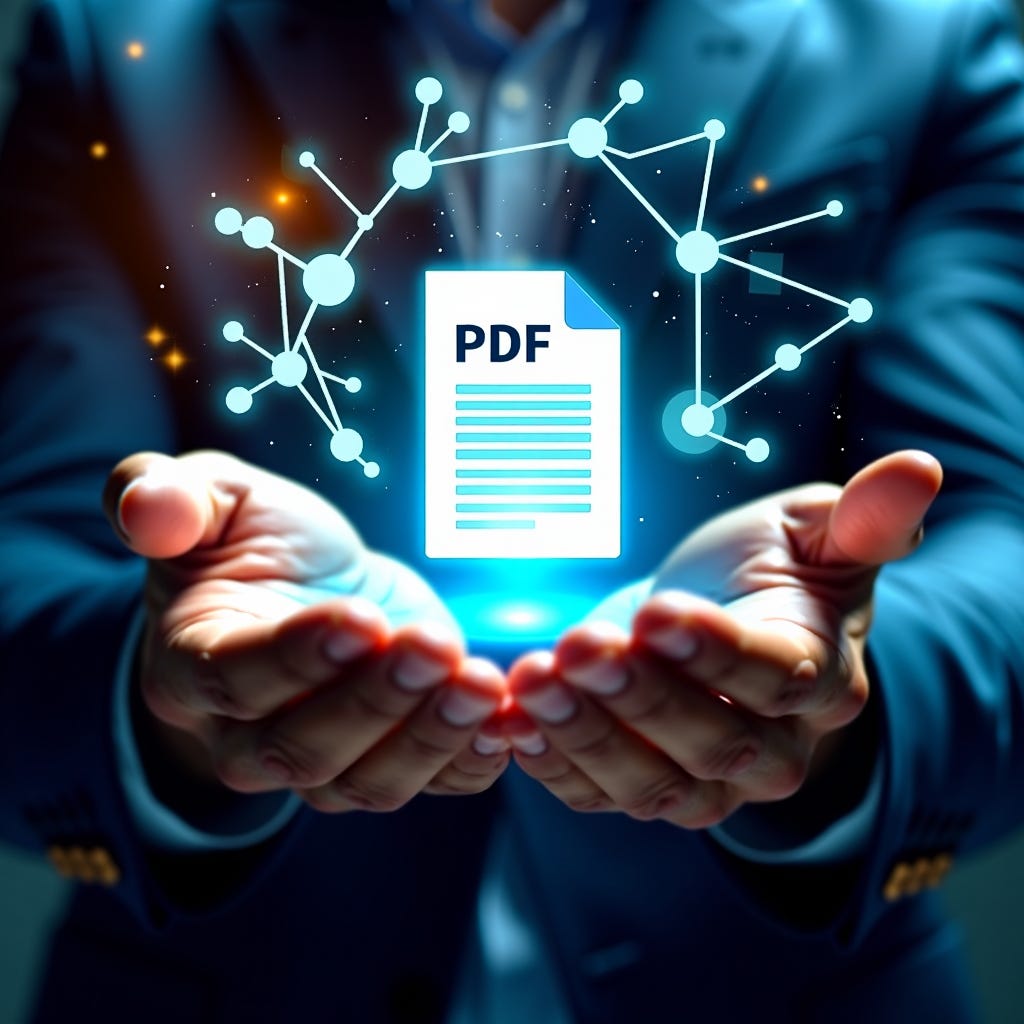
Enhanced multimodal PDFs: Understands text, images, graphs within PDFs. Previously it focused on text. Now it processes complete visual information.
For technical documentation? Game changer. Architecture diagrams. Performance charts. Code screenshots. All indexed. All searchable.
Mobile improvements: Flashcards on phone. Quizzes during commute. One-tap content saving from web browser. The learning system follows you.
15 Advanced Tips & Tricks
1. Set Custom Goals for Technical Accuracy
Click the settings icon in chat. Set goal: “Act as a senior software architect focused on scalability and maintainability.” NotebookLM’s responses adapt to this role. More technical depth. Architectural focus.
2. Use Interactive Audio for Debugging
Generate audio overview of a problematic module. Listen until the AI hosts discuss the relevant section. Jump in. Ask: “Why would this cause a race condition?” They incorporate your question into the conversation.
3. Chain Outputs for Complex Understanding
Generate mind map first. Identify confusing connections. Generate audio overview focusing on those connections. Take quiz to verify understanding. Each output builds on the previous.
4. Structure Questions for Better Citations
Instead of: “What does this code do?” Ask: “What are the three main components of this authentication system and how do they interact?”
Specific questions get specific citations.
5. Use Discover Sources When Stuck
Hit a technical wall? Click “Discover sources” in your notebook. Ask it to find relevant documentation or examples. It searches the web. Suggests sources. You add what’s useful.
6. Create Module-Specific Notebooks
Don’t put entire codebase in one notebook unless you’re on the paid plan (300 sources). Create focused notebooks: “Authentication System,” “API Layer,” “Database Models.” Each stays under 30 sources (free tier).
7. Screenshot Mind Maps for Claude Code
Generate mind map of your architecture. Screenshot it. Upload to Claude Code as context image. Claude can reference the visual structure during implementation.
8. Generate Comparison Reports
Upload multiple approaches to solving the same problem. Request: “Create a report comparing these three authentication strategies, highlighting tradeoffs.” Use this for technical decision-making.
9. Use Learning Guide Mode for Code Concepts
Stuck on a concept in your codebase? Ask in Learning Guide mode. NotebookLM doesn’t just explain it. It breaks it down step by step. Adapts to your understanding level. Asks you questions to verify comprehension.
10. Create Onboarding Notebooks
New team member? Create notebook with: codebase files, architecture docs, past design decisions. Generate audio overviews for each major system. They listen during their first week. Self-paced learning.
11. Quiz Yourself Before Code Review
Before reviewing a pull request, upload the changed files. Generate quiz about the implementation. Take it. If you can’t answer the questions, you don’t understand the changes well enough to review them.
12. Use Multiple Languages for Global Teams
Generate audio overview in English. Generate another in Spanish. Another in Japanese. Same content. Different languages. Output language selector in Studio settings.
13. Save Conversation History
Important insight during chat? Conversations now persist between sessions (new feature). Return tomorrow. Continue where you left off. No context loss.
14. Combine Video + Audio for Dense Material
Very complex module? Generate video overview first (visual architecture). Then audio overview (conversational explanation). Different cognitive pathways. Better retention.
15. Use Flashcards for API Mastery
Upload API documentation. Generate flashcards for endpoints, parameters, response formats. Review them before implementation. Claude Code benefits from your API fluency.
Where This Goes

You’ve seen the progression: from uploading your first document to running multi-notebook development workflows with Claude Code.
The pattern that emerges: NotebookLM is your learning layer. Claude Code is your execution layer.
When you code with Claude, focus on the goal. The output. The implementation. Be precise. Direct. Know what you want built.
NotebookLM is where you build that knowledge. Where you develop the mental models that let you instruct Claude effectively.
The same sources. Multiple formats. Each targeting different learning needs:
-
Audio while walking
-
Video while reviewing architecture
-
Mind maps for system understanding
-
Reports for quick reference
-
Flashcards for retention testing
Result: you understand the domain before you start building. When you open Claude Code, you’re not figuring out what you want. You’re instructing based on understanding.
The division matters: learning in the same session as implementing causes both to suffer. Context switches between modes. Knowledge gaps appear mid-implementation. Flow breaks.
Separate them. Learn thoroughly in NotebookLM. Then build precisely with Claude Code.
Your Next Steps
If you’re just starting:
-
Create your first notebook with 2-3 related documents
-
Ask specific questions and verify citations
-
Generate your first audio overview
-
Try one workflow from this guide
If you’re ready for Claude Code integration:
-
Pick one workflow that matches your current project
-
Create the NotebookLM notebook with relevant sources
-
Follow the steps as described above
-
Note what works for your specific use case
If you want to go deep:
-
Set up multiple notebooks for different project areas
-
Implement all five workflows in your development process
-
Customize the tips for your team’s needs
-
Build your documentation system
The system gets smarter as you learn. Not because the AI improves. Because you do.
Bookmark this article for later when you have a bit of time to sit down and walk through it.
About the Author
Michael is a self-taught programmer who specializes in AI-assisted development frameworks.
He’s spent hundreds of hours exploring orchestration patterns and extensibility features in Claude Code, focusing on techniques that scale beyond simple tasks into genuinely complex and autonomous workflows.
He writes Claude Code: Response Awareness Methodology teaching developers to build sophisticated systems using AI tools and orchestration patterns.
Also see:
The AI-Augmented Engineer
From a Software Engineer:

In the Weeds
From a Product Manager:

Thanks for reading!
Claude Code Reading List
-
The 5 Claude Skills Every Digital Product Creator Needs
-
Claude Skills 101: Build your first custom AI skill in 20 minutes
-
Claude Cowork in 30 minutes (Free Course)
-
Claude Code for Everything: Finally, that Personal Assistant You’ve Always Wanted
-
Claude Code Can Make Videos Now (Full Guide)
-
Claude Code for Everything: How the Guy Who Built It Actually Uses It
-
The Non-Coder’s Guide to Claude Code
-
Claude Code Beyond Basics: The Power of Skills & MCP
-
Claude Code Masterclass Introduction
-
Claude Code Hits Different
-
How to run Claude Code with Ollama locally
-
Anthropic’s Claude Code is having its “ChatGPT” moment
Read More in AI Supremacy